Connecting your laptop to a TV can transform your entertainment experience, whether you’re streaming movies, gaming, or giving a presentation. A larger screen elevates visuals and audio, making it ideal for both personal and professional use. Fortunately, modern technology offers multiple ways to achieve this connection, with HDMI and wireless methods being the most popular. This article dives into the step-by-step processes for both approaches, compares their pros and cons, and provides practical tips to ensure a seamless setup. Whether you’re a tech novice or a seasoned user, this guide will help you mirror or extend your laptop’s display to a TV effortlessly.
Why Connect Your Laptop to a TV?
Connecting your laptop to a TV opens up a world of possibilities. Imagine streaming your favorite Netflix series on a 55-inch 4K screen instead of squinting at a 15-inch laptop display. Gamers can enjoy immersive visuals, while professionals can use a TV as a second monitor for presentations or collaborative work. Both HDMI and wireless methods make this connection accessible, but each has unique advantages and limitations. This article explores both options in detail, ensuring you can choose the method that best suits your needs.
HDMI Connection: The Wired Solution
What You Need for an HDMI Connection
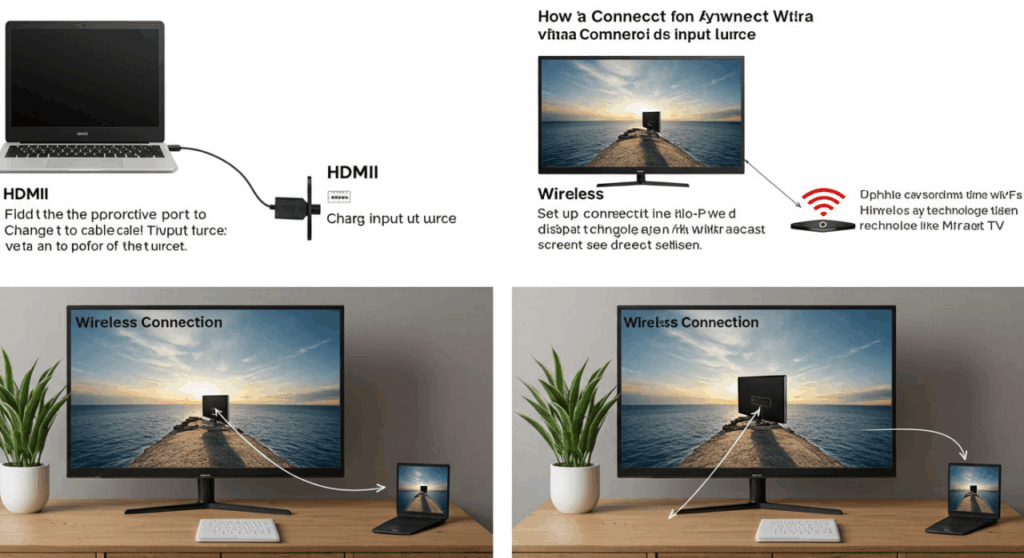
HDMI (High-Definition Multimedia Interface) is the gold standard for connecting devices due to its reliability and ability to transmit high-quality audio and video. To connect your laptop to a TV via HDMI, you’ll need:
- An HDMI cable (version 2.0 or higher for 4K support).
- A laptop with an HDMI output port.
- A TV with an HDMI input port.
- Optionally, an adapter (e.g., USB-C to HDMI or VGA to HDMI) if your laptop lacks a standard HDMI port.
Most modern laptops and TVs come equipped with HDMI ports, making this a straightforward option for most users.
Step-by-Step Guide to Connect via HDMI
- Check Compatibility: Confirm that both your laptop and TV have HDMI ports. If your laptop only has USB-C or Thunderbolt, purchase a compatible adapter.
- Select the Right HDMI Cable: For 1080p resolution, any HDMI cable will suffice. For 4K or HDR content, opt for a High-Speed HDMI cable (18 Gbps or higher).
- Connect the Devices: Plug one end of the HDMI cable into your laptop’s HDMI port and the other into your TV’s HDMI input port (e.g., HDMI 1, HDMI 2).
- Switch TV Input: Use your TV’s remote to select the corresponding HDMI input (e.g., HDMI 1). This is usually done via the “Input” or “Source” button.
- Configure Laptop Display: On Windows, press Win + P to choose between “Duplicate” (mirrors the laptop screen), “Extend” (uses the TV as a second monitor), or “Second Screen Only” (disables the laptop screen). On macOS, go to System Settings > Displays to adjust similar settings.
- Adjust Resolution: Ensure the resolution matches your TV’s capabilities (e.g., 1920×1080 for Full HD or 3840×2160 for 4K). On Windows, go to Settings > System > Display; on macOS, navigate to System Settings > Displays.
- Test Audio: HDMI carries audio, so your TV’s speakers should play sound automatically. If not, check your laptop’s sound output settings and select the TV as the audio device.
Pros and Cons of HDMI Connection
Pros:
- Reliable and stable connection with minimal lag.
- Supports high resolutions (up to 4K or 8K with newer HDMI versions).
- Transmits both audio and video through a single cable.
- Easy setup with plug-and-play functionality.
Cons:
- Requires a physical cable, which can be cumbersome.
- Limited by cable length (typically 6-15 feet for optimal performance).
- Not ideal for clutter-free setups.
HDMI is perfect for users prioritizing quality and simplicity, especially for high-definition content or gaming.
Wireless Connection: The Cable-Free Alternative
Understanding Wireless Connection Options
Wireless connections eliminate the need for cables, offering flexibility and a cleaner setup. Popular methods include Miracast, Chromecast, Apple AirPlay, and smart TV apps. The suitability of each method depends on your laptop, TV, and network capabilities. Below, we explore the most common wireless options and how to set them up.
Method 1: Miracast (Windows)
Miracast is a wireless display standard supported by most Windows laptops and many smart TVs. It allows screen mirroring without additional hardware.
Steps to Connect via Miracast
- Check Compatibility: Ensure your TV supports Miracast (check the TV manual or settings). On your laptop, go to Settings > System > Display > Connect to a Wireless Display to confirm Miracast support.
- Enable Miracast on TV: Navigate to your TV’s settings and enable Miracast or Screen Mirroring.
- Connect from Laptop: On Windows, press Win + P, select “Connect to a Wireless Display,” and choose your TV from the list.
- Authenticate: Some TVs require a PIN for security. Enter the PIN displayed on the TV screen.
- Adjust Settings: Choose to duplicate or extend your display, similar to the HDMI setup.
Method 2: Chromecast (Windows/macOS)
Google Chromecast is a popular device that plugs into your TV’s HDMI port, enabling wireless streaming from your laptop.
Steps to Connect via Chromecast
- Set Up Chromecast: Plug the Chromecast into your TV’s HDMI port and follow the on-screen setup using the Google Home app on your phone or laptop.
- Connect to Wi-Fi: Ensure your laptop and Chromecast are on the same Wi-Fi network.
- Cast from Browser: Open Google Chrome, click the three-dot menu, select “Cast,” and choose your Chromecast device. You can cast a tab, file, or your entire desktop.
- Optimize Streaming: For smooth performance, ensure a strong Wi-Fi signal and close unnecessary apps.
Method 3: Apple AirPlay (macOS)
AirPlay is Apple’s wireless streaming protocol, ideal for macOS users with an Apple TV or AirPlay-compatible smart TV.
Steps to Connect via AirPlay
- Verify Compatibility: Confirm your TV supports AirPlay (e.g., via Apple TV or a compatible smart TV like Samsung or LG models).
- Connect to Wi-Fi: Ensure your Mac and TV are on the same Wi-Fi network.
- Enable AirPlay: On your Mac, click the AirPlay icon in the menu bar (or go to System Settings > Displays) and select your TV.
- Authenticate: Enter the passcode displayed on the TV, if prompted.
- Choose Display Mode: Select “Mirror Display” or “Use as Separate Display” based on your preference.
Pros and Cons of Wireless Connection
Pros:
- Cable-free for a clean, flexible setup.
- Ideal for presentations or multi-device streaming.
- Supports multiple platforms (Windows, macOS, Android, iOS).
Cons:
- Potential lag or quality loss due to network issues.
- Requires compatible devices or additional hardware (e.g., Chromecast).
- Setup can be more complex than HDMI.
Wireless connections are best for users who value mobility and minimal clutter, though a stable Wi-Fi network is crucial.
Tips for a Seamless Connection
- Check Compatibility: Always verify that your laptop and TV support the chosen method before purchasing cables or devices.
- Update Drivers: Ensure your laptop’s graphics and network drivers are up to date to avoid connectivity issues.
- Optimize Wi-Fi: For wireless methods, use a 5GHz Wi-Fi band for faster speeds and less interference.
- Test Before Use: For presentations or events, test the connection in advance to troubleshoot any issues.
- Cable Management: For HDMI, use cable organizers to keep your setup tidy.
Troubleshooting Common Issues
HDMI Issues
- No Signal: Ensure the correct HDMI input is selected on the TV and the cable is securely connected.
- No Audio: Check your laptop’s audio output settings and select the TV as the playback device.
- Resolution Mismatch: Adjust the display resolution to match your TV’s native resolution.
Wireless Issues
- Connection Drops: Move closer to the Wi-Fi router or reduce network congestion by closing other apps.
- Lag or Stuttering: Lower the streaming quality or switch to a wired connection for better performance.
- Device Not Found: Restart both devices and ensure they’re on the same Wi-Fi network.
HDMI vs. Wireless: Which Should You Choose?
HDMI is the go-to choice for users seeking a plug-and-play solution with minimal lag and maximum quality. It’s ideal for gaming, 4K streaming, or professional setups where reliability is key. Wireless methods, on the other hand, offer flexibility and convenience, making them perfect for casual use or environments where cables are impractical. Consider your priorities—image quality, ease of setup, or mobility—when choosing the best method.
FAQ
Can I connect my laptop to a TV without an HDMI port?
Yes, you can use an adapter (e.g., USB-C to HDMI or VGA to HDMI) or opt for wireless methods like Miracast, Chromecast, or AirPlay, depending on your laptop and TV compatibility.
Why is there no sound when using HDMI?
This is often due to incorrect audio output settings. On your laptop, go to sound settings and select the TV as the playback device. Ensure the TV’s volume is not muted.
Do I need a smart TV for wireless connections?
Not always. For Miracast or AirPlay, your TV needs to support these protocols. Alternatively, devices like Chromecast or Apple TV can add wireless functionality to any TV with an HDMI port.
Can I use both HDMI and wireless connections simultaneously?
Technically, yes, but it’s unnecessary and may cause conflicts. Choose one method based on your needs to avoid complications.
What’s the maximum HDMI cable length for a reliable connection?
For most setups, 6-15 feet is ideal. Longer cables (up to 50 feet) can work but may require a signal booster for high resolutions like 4K.
By following this guide, you can effortlessly connect your laptop to a TV using either HDMI or wireless methods, enhancing your viewing experience for work or play.